
To setup NanoCAD for plotting first you will need to set your setting up to use Nanocad for plotting.
Go into Settings\Job Settings and select the Plotting tab.
Select the Use External Plotedit Program.
Select Program Path to the NanoCAD executable located in the software installation directory.
Next, choose your custom border file or a preset boarder file.
Then, choose any Template drawing files you would like to use. 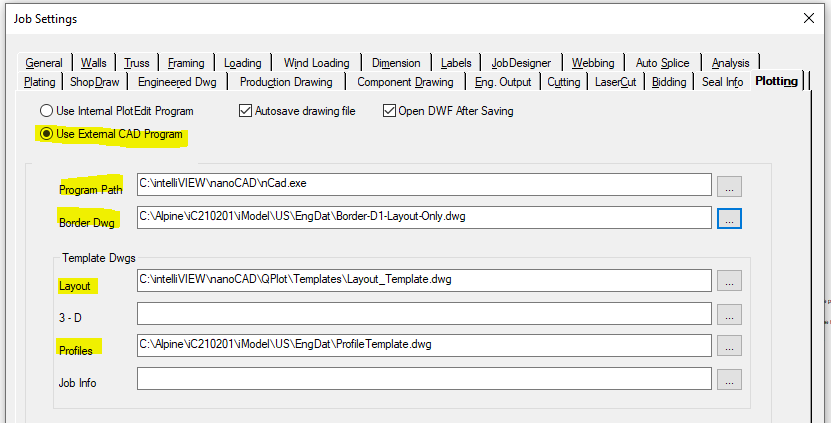
After your settings have been set now you can create the DWGs. Go to the Layout pull down menu and select Create DWG's.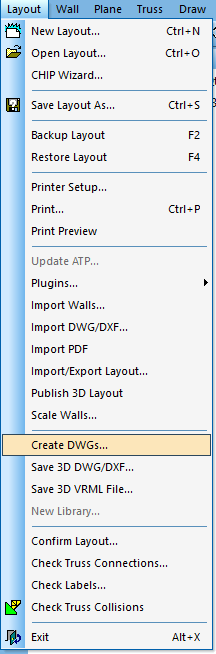
When the Save to DWG window appears select what information you would like to appear on your drawing. Selection of the Delete Previous DWGs toggle option automatically removes the dwg files from the previous creation from the job folder. If you have made a change to the border drawing file path in Settings\Job Settings\Plotting Tab\Border File path you will want to select the Re-acqure Border file option so that the correct border file is loaded into the plotting page.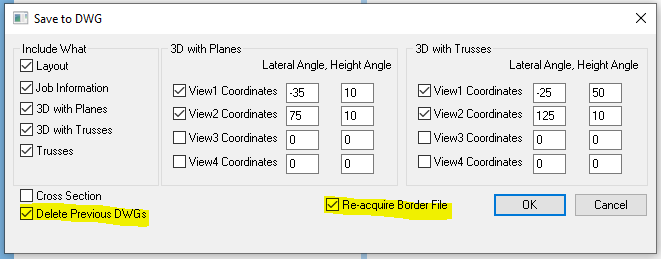
Now follow the prompts at the bottom of the screen, to select your truss profiles (only if Trusses was selected).
Then, click on the plotting icon from the main toolbar and this will launch NanoCAD.
For more in-depth information on setting up plotting to NanoCAD look in the in-bedded help file in Intelliview\Help\Help Documentation\External nanoCAD Plotting Tool with IntelliVIEW Plugin
-
Please reach out if any further assistance is required.
Helpdesk: 866.237.2878
Email Support: helpdesk@alpineitw.com
www.alpineitw.com
www.alpineacademyitw.com